Introduction
In the second part of our NGINX Survival Guide, we dive into the practical aspects of using NGINX to serve web applications. This section will guide you through the essential tasks of setting up a basic HTTP server, configuring NGINX to serve content from custom directories, and using it as a reverse proxy to forward requests to backend servers.
NGINX is a versatile web server that can be used to serve applications in a variety of ways, from simple web servers to complex proxy configurations. NGINX can be used to serve static HTML content, proxy requests to a backend server, or load balance traffic across multiple servers. In this guide, we'll explore the different ways to use NGINX to serve applications, including setting up a simple HTTP server, serving content from custom directories, and using it to load balance traffic across multiple upstream servers.
Simple HTTP Server
NGINX serves as the default HTTP server on port 80 of your local machine if NGINX is properly installed and running on your system. If you head on to the localhost, you will see the default NGINX HTML page like the one below:
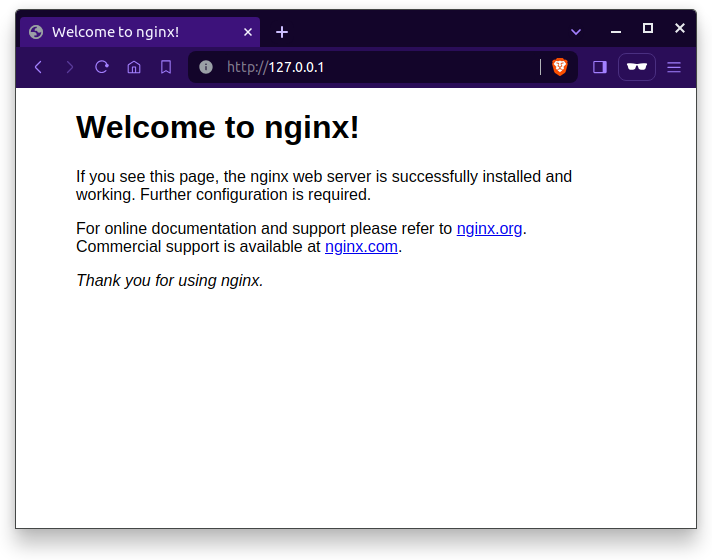
This is the default HTML page served by NGINX as per the configuration in the /etc/nginx/nginx.conf file. The default folder for NGINX to serve HTML content is located at /usr/share/nginx/html/index.html , If you change the contents of this file and restart NGINX, the http server will load the new HTML content.
Let's first look, at how we can serve a simple http message within the configuration file in NGINX.
Serving simple text
We will try to write our simple HTTP server from scratch, so it would be nice to empty the existing /etc/nginx/nginx.conf file or use other ports to serve the content rather than the default 127.0.0.1:80 port.
http {
    server {
        listen 8000;
        return 200 "Hello, World!
";
    }
}
The above config will serve the text Hello, World! when there is a request to the URL 127.0.0.1:8000 or localhost:8000 You can change the port per your requirements and even add a server_name for your domain name.
$ curl http://127.0.0.1:8000
Hello, World!


$ curl -i http://127.0.0.1:8000
HTTP/1.1 200 OK
Server: nginx/1.18.0 (Ubuntu)
Date: Sat, 03 Feb 2024 11:41:16 GMT
Content-Type: application/octet-stream
Content-Length: 14
Connection: keep-alive

Hello, World!
As we can see the NGINX served the HTTP content when the request was made to port 8000 on the localhost.
Serving from a custom path/folder
But things are not like these in the real world, we need to serve an entire directory of HTML pages. We need to add the root directive with the path to the folder where our HTML content resides. The path should have the index.html file as the starting point of the request.
http {
    server {
        listen 8000;
        root /srv/techstructive-blog;
        index index.html;
    }
}
NOTE: The path to the HTML content needs to be accessible and the Nginx process should have the read permission to serve the contents.
It is commonly recommended to store HTML/static content files in directories such as /srv or /var/www. These paths follow conventions for serving static files and web applications in Unix-type operating systems. While it's not a strict requirement, adhering to these conventions can improve the organization and maintainability of web content.
Serving from a web server
If you already have a web server running in a port on your system, you could use Nginx as a gateway to the application instead of exposing your application to the internet.
We could use the proxy_pass directive in the location setting to specify which URL to pass the request to, the listen will forward the request to the proxy specified in the location directive.
http {
	server {
		listen 80;
		location / {
			proxy_pass http://localhost:8001;
		}
	}
}
In the above example, the NGINX listens to port 80 in the local system and sends the request to the localhost at port 8001. The proxy_pass is used to specify the URL to redirect the request to.
-
listen 80: Nginx listens for incoming requests on port 80, the standard HTTP port.
-
location /: This directive matches all incoming requests, regardless of the path.
-
proxy_passhttp://localhost:8001: Requests are forwarded to the web application running on localhost at port 8001.
This example configuration is a basic building block for setting up more complex proxy configurations with NGINX.
Serving from Multiple Upstream Servers
NGINX can also serve content from multiple upstream servers, balancing the load between them. This is useful for high-traffic applications that require multiple backend servers to handle the load.
What are upstream servers, you might ask, well in the context of NGINX, upstream servers refer to backend servers that handle the actual processing of requests. NGINX acts as a gateway, forwarding incoming requests to these upstream servers. This setup allows NGINX to manage the traffic efficiently and distribute it among multiple servers, which can be particularly beneficial for high-traffic applications. . For example, you might have your application running on localhost:8001 and localhost:8002.
Here’s an example configuration:
http {
    upstream myapp {
        server backend1.example.com;
        server backend2.example.com;
        server backend3.example.com;
    }

    server {
        listen 80;

        location / {
            proxy_pass http://myapp;
        }
    }
}
In this configuration:
-
The
upstreamblock defines a named group of backend servers (myapp). -
The
serverblock listens on port 80 and proxies requests to the upstream group defined earlier. -
upstream myapp: This directive creates a group of backend servers namedmyapp. -
server backend1.example.com: These directives list the backend servers that will handle the requests. These can be specified by hostname, IP address, or combination. -
proxy_passhttp://myapp: This directive tells NGINX to forward incoming requests to themyappupstream group.
Why Use Upstream Servers?
Using upstream servers has several advantages:
-
Scalability: By distributing requests across multiple servers, you can handle more traffic and scale your application horizontally.
-
Fault Tolerance: If one of the backend servers goes down, NGINX can continue to serve requests using the remaining servers, ensuring high availability.
-
Load Distribution: Upstream servers help in balancing the load, which can improve the performance and responsiveness of your web application.
The below configuration sets up NGINX to act as a gateway that distributes incoming traffic to multiple upstream servers. It defines an upstream block with servers at localhost:8001 and localhost:8002, and forward requests to these servers.
http {
    upstream myapp {
        server localhost:8001;
        server localhost:8002;
    }

    server {
        listen 80;

        location / {
            proxy_pass http://myapp;
        }
    }
}
The provided NGINX configuration sets up an upstream block named myapp with two backend servers running on localhost at ports 8001 and 8002. The server block listens on port 80 and uses a location block to match all incoming requests to the root URL (/). These requests are forwarded to the myapp upstream group via the proxy_pass directive, allowing NGINX to distribute the requests between the two backend servers, effectively balancing the load and enhancing the application's performance and reliability.
Conclusion
From this part of ther series, we have learned how to set up a simple HTTP server to serve content from custom directories and using NGINX as a gateway to backend servers, which covered essential ways to utilize NGINX for serving web applications.
That's it from this part of the series, we will look into detail how to use NGINX as a load balancer and reverse proxy, serving static files, and caching content in the next part of the series, where we'll dive deeper into advanced NGINX configurations. Thank you for reading, hopefully you found this helpful. If you have any feedback, questions, or queries drop them below in the comments or reach me out directly on my social handles.
Happy Coding :)